Indoor plants transform any space — they purify the air, reduce stress, add natural beauty, and bring a sense of calm to homes and offices. But for many people, keeping indoor plants alive is a struggle. Leaves go yellow, plants wilt, roots rot, and what started as a thriving plant slowly declines.
The truth is, most indoor plant problems come from a handful of very common mistakes — and they're all avoidable once you understand what plants actually need. This complete guide covers everything from watering and light to fertilising, repotting, and pest control, so you can keep your indoor plants healthy and thriving all year long.
1. Watering — Getting It Right Every Time
Overwatering is the single most common reason indoor plants die. More houseplants are killed by too much water than by any other cause. The mistake is usually not the amount of water given at once, but watering too frequently before the soil has had a chance to dry out.
How to Know When to Water
The most reliable method is the finger test: push your finger 2–3 cm into the soil. If it feels dry at that depth, it's time to water. If it still feels moist, wait another day or two and check again. Never water on a fixed schedule — a plant's needs change with the season, temperature, and light levels.
📏 Quick rule: Most tropical indoor plants need watering every 7–10 days. Succulents and cacti can go 2–4 weeks between waterings. Ferns and Peace Lilies prefer more consistent moisture.
How to Water Properly
When you do water, water thoroughly. Pour water slowly and steadily onto the soil until it runs out of the drainage holes at the bottom of the pot. This ensures water reaches all the roots, not just the surface. Then stop — never let a plant sit in standing water in its saucer, as this causes root rot.
Alternatively, for hairy-leaved plants or those in soilless mixes, bottom watering works well. Place the pot in a shallow bowl of water for 10–15 minutes and let the soil absorb moisture from the bottom up. Remove the plant before any water pools at the surface.
Water Quality
Room-temperature water is best. Cold water can shock plant roots. If your tap water is heavily chlorinated, leave it in an open container overnight before using — the chlorine will dissipate. Some sensitive plants like Peace Lilies can develop brown tips from fluoride in tap water; for these, filtered or collected rainwater is ideal.
💡 Tip: Pick up your pot before and after watering. A light pot means the soil is dry; a heavy pot means there's still moisture in there. This quick check saves a lot of overwatering.
2. Light — Matching Plants to Your Space
Light is the engine of plant growth. Without adequate light, even perfect watering and soil won't keep a plant healthy. Understanding the light conditions in your space is the first step to choosing the right plants.
Types of Indoor Light
• Bright direct light — Sunlight falls directly on the plant for several hours. Good for cacti, succulents, and some herbs.
• Bright indirect light — Near a window but no direct sun. Ideal for most tropical houseplants including Pothos, Monsteras, and Fiddle Leaf Figs.
• Medium light — A few feet from a window. Suits plants like ZZ Plants, Snake Plants, and Aglaonema.
• Low light — Far from windows or in north-facing rooms. Very few plants thrive here; Snake Plants and ZZ Plants are among the most tolerant.
Signs of Too Much or Too Little Light
Too much light causes bleached, washed-out leaves or brown, scorched patches. Too little light causes slow growth, pale or yellowing leaves, and stems that stretch long and spindly toward the nearest light source — a behaviour called etiolation.
If your space lacks natural light, a simple daylight LED bulb (equivalent to 60 watts or more) placed close to the plant for 12–14 hours a day provides a good supplement for most common houseplants.
🌿 Tip: Rotate your plants a quarter turn every 1–2 weeks so all sides receive even light exposure and the plant grows symmetrically rather than leaning to one side.
3. Humidity — Why It Matters More Than You Think
Most popular indoor plants originate from tropical rainforests where humidity is consistently high — often 60–80%. The average air-conditioned home or office sits closer to 30–40% humidity, which is too dry for many plants.
Signs of Low Humidity
• Brown, crispy leaf tips — the most common indicator
• Curling or wilting leaves despite adequate watering
• Yellowing on leaf edges
How to Increase Humidity
• Pebble tray method — Place the pot on a tray filled with pebbles and water. As the water evaporates, it increases humidity around the plant. Keep the water level below the pot base so roots don't sit in water.
• Group plants together — Plants release moisture through their leaves (transpiration), creating a more humid microclimate when clustered together.
• Misting — Mist tropical plants lightly every few days using a fine spray bottle. Mist in the morning so moisture evaporates during the day. Avoid misting succulents, cacti, or Snake Plants.
• Humidifier — The most effective solution for very humidity-sensitive plants like Ferns, Calatheas, and Orchids.
🌱 Plants like Areca Palms naturally add moisture to indoor air through transpiration — a practical choice for dry air-conditioned spaces in Qatar.
4. Soil — Choosing the Right Growing Medium
The soil you use has a direct impact on how well your plant absorbs water and nutrients. Garden soil is never suitable for indoor plants — it compacts in pots, drains poorly, and can introduce pests and diseases.
Potting Mix Types
• All-purpose potting mix — Suitable for most tropical houseplants. Well-draining and lightweight.
• Cactus and succulent mix — Contains more sand and perlite for fast drainage. Never use regular potting soil for succulents.
• Orchid bark mix — Used for orchids and some epiphytic plants that need excellent airflow around their roots.
A good quality potting mix holds enough moisture for roots to absorb while still draining freely so water doesn't pool around the root zone. For extra drainage, add a layer of expanded clay or perlite to the bottom of the pot.
Browse our range of potting soils and soil enhancers at Garden.qa — selected for Qatar's indoor conditions.
5. Pots and Drainage — The Foundation of Healthy Roots
The right pot is just as important as the right soil. The single most critical feature is a drainage hole at the bottom. Without it, water has nowhere to go and collects at the base of the pot, suffocating roots and causing root rot.
Choosing the Right Pot Size
Choose a pot that is only 2–5 cm larger in diameter than the plant's current root ball. A pot that is too large holds excess moisture the roots can't absorb, greatly increasing the risk of root rot. When repotting, always move up just one pot size at a time.
Pot Materials
• Terracotta — Porous and breathable, helps soil dry out faster. Excellent for succulents, cacti, and plants prone to overwatering.
• Ceramic and glazed pots — Non-porous, retains moisture longer. Better for moisture-loving tropicals like Ferns and Peace Lilies.
• Plastic — Lightweight, inexpensive, retains moisture. Good for most houseplants and ideal as inner nursery pots inside decorative cachepots.
🪴 Tip: If you fall in love with a decorative pot that has no drainage hole, use it as a cachepot. Place your plant in a plain plastic nursery pot with drainage holes, and sit it inside the decorative outer pot.
Explore our full range of pots and planters — from clay and terracotta to fiberglass and decorative ceramic.
6. Fertilising — Feeding Plants the Right Way
Indoor plants grow in a limited volume of soil that eventually loses its nutrients. Fertilising replenishes those nutrients and supports healthy, vigorous growth — but more is not better. Over-fertilising burns roots and causes more damage than not fertilising at all.
When to Fertilise
Fertilise during the active growing season only — typically spring and summer (or in Qatar's case, October through April when temperatures are mild). Do not fertilise during the hottest months or when a plant is stressed, newly repotted, or recently purchased.
How Often
• Most houseplants — once every 4–6 weeks during the growing season
• Fast-growing tropicals like Pothos and Monsteras — once every 2–4 weeks
• Succulents and cacti — once every 2–3 months, at half strength
What Fertiliser to Use
A balanced liquid fertiliser (equal parts nitrogen, phosphorus, and potassium — labelled as 10-10-10 or similar) suits most houseplants. For flowering plants, choose a fertiliser slightly higher in phosphorus to support blooming.
⚠️ Always dilute liquid fertiliser to half the recommended strength for indoor plants. Full-strength doses are too concentrated for the limited soil volume in a pot.
Shop our range of plant food and fertilisers, including organic and liquid options.
7. Repotting — Knowing When It's Time
Plants don't need to be repotted often — once every 1–2 years is usually enough for most houseplants. Repotting too frequently disturbs roots unnecessarily and stresses the plant.
Signs It's Time to Repot
• Roots growing out of the drainage holes at the bottom of the pot
• Water runs straight through the pot without being absorbed — the pot is more root than soil
• The plant tips over easily due to top-heavy growth in a small base
• Noticeably slowed growth despite good light, water, and fertiliser
How to Repot
• Choose a new pot 2–5 cm larger in diameter than the current one
• Gently tip the plant on its side and ease it out of the pot — never pull by the stem
• Shake off excess old soil and inspect the roots. Trim any dead or rotten roots with clean scissors
• Add fresh potting mix to the base of the new pot, position the plant, and fill around the root ball
• Water thoroughly after repotting and place in bright indirect light for a week to recover
📅 The best time to repot is early spring (or October–November in Qatar) when plants are entering their active growing season and can recover quickly.
8. Cleaning Leaves — Often Overlooked, Always Worth It
Dust accumulates on plant leaves just as it does on furniture. A layer of dust blocks light from reaching the leaf surface, reducing the plant's ability to photosynthesise — and it also attracts pests.
Wipe leaves gently with a damp soft cloth every few weeks, or place plants in the shower and rinse them with lukewarm water. For plants with hairy leaves like African Violets, use a soft dry brush instead — never wet their foliage.
✨ Clean, dust-free leaves are noticeably shinier and healthier-looking. It's a simple step that makes a visible difference to the appearance of your plants.
9. Pruning and Tidying — Keeping Plants Healthy and Shaped
Regular light pruning keeps indoor plants looking neat and encourages bushy, full growth. It also removes dying material that can attract pests or disease.
What to Remove
• Yellow or brown leaves — remove them cleanly at the base
• Dead flower heads — prevents the plant wasting energy on seed production
• Leggy or overly long stems — cutting these back encourages new growth lower down
• Any leaves showing signs of pest damage or disease
Always use clean, sharp scissors or pruning shears. Blunt tools crush rather than cut stems, leaving ragged wounds that are slow to heal and vulnerable to disease.
10. Pest Control — Catching Problems Early
Even well-cared-for indoor plants can develop pests. Catching infestations early is the key — a small pest population is easy to deal with; a large one can be very difficult to reverse.
Most Common Indoor Plant Pests
• Spider mites — Tiny webs on the undersides of leaves. Thrive in warm, dry conditions.
• Mealybugs — White fluffy deposits at leaf joints and on stems.
• Fungus gnats — Small flies around the soil. Caused by consistently overwatered soil.
• Aphids — Clusters of tiny insects on new growth. Cause distorted, sticky leaves.
• Scale — Brown bumps on stems. Difficult to spot, easy to mistake for part of the plant.
Treatment
For most pests, neem oil spray is the most effective organic treatment. Mix neem oil with water and a few drops of liquid soap, and spray thoroughly over the plant — especially the undersides of leaves where pests hide. Repeat every 5–7 days for 3 weeks to break the breeding cycle.
For mealybugs and scale, dab affected areas with a cotton swab dipped in diluted rubbing alcohol before spraying.
🔍 Tip: Inspect new plants carefully before bringing them into your home. New plants are the most common way pests are introduced to an indoor garden.
We stock organic pest sprays and neem-based fertilisers that are safe for indoor use.
Best Indoor Plants for Beginners
If you're just getting started, choosing low-maintenance plants makes all the difference. These varieties are forgiving, adaptable, and thrive in a range of indoor conditions:
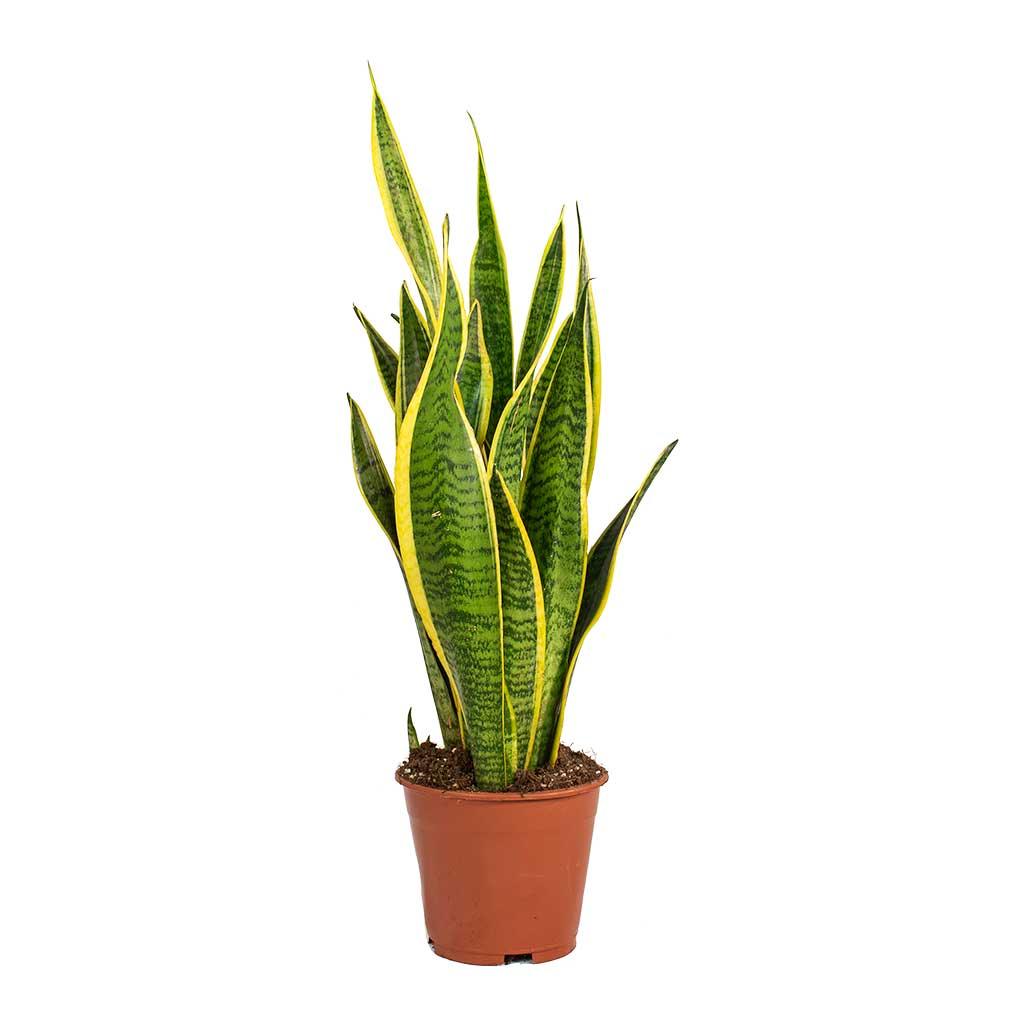
• Snake Plant (Sansevieria) — Virtually indestructible. Tolerates low light, irregular watering, and dry air.
• ZZ Plant (Zamioculcas) — Stores water in its roots, making it highly drought-tolerant. Glossy, architectural look.
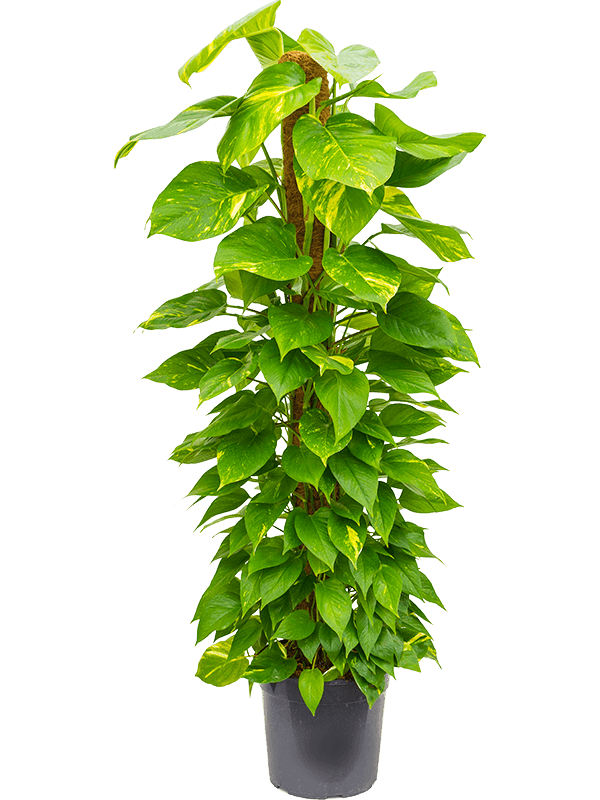
• Money Plant / Pothos (Scindapsus) — Fast-growing, trailing plant that thrives in almost any light condition. Ideal for shelves and hanging positions.
• Peace Lily (Spathiphyllum) — One of the best air-purifying indoor plants. Signals when it needs water by gently drooping.
• Aglaonema — Stunning foliage in green and red varieties. Handles low light and infrequent watering well.
• Areca Palm — Adds natural humidity to indoor air. A statement plant for living rooms and lobbies.
Quick Care Reference Summary
• Water when the top 2–3 cm of soil is dry — not on a fixed schedule
• Place most plants in bright, indirect light — away from harsh direct sun
• Increase humidity with a pebble tray, grouping plants, or light misting
• Always use a pot with drainage holes and quality indoor potting mix
• Fertilise every 4–6 weeks during the growing season only — at half strength
• Repot when roots outgrow the pot, moving up just one size at a time
• Clean leaves monthly to remove dust and improve light absorption
• Inspect plants weekly for early signs of pests — neem oil is your best friend
Final Thoughts
Caring for indoor plants doesn't have to be complicated. Most plants need very little — the right amount of light, water when the soil dries out, an occasional feed, and a clean environment. The key is observation: check your plants regularly, respond to what you see, and adjust your care as the seasons change.
Start with one or two easy varieties, build confidence, and expand your collection from there. Once you understand the fundamentals, indoor plant care becomes second nature.
🌿 Ready to start your indoor garden? Browse all indoor plants at Garden.qa — hand-selected for Qatar's indoor conditions, with delivery across Qatar.
Also available: pots & planters, soil & fertilisers, and watering tools — everything you need in one order.